Monday, February 28, 2011

St. Patrick's day Banner

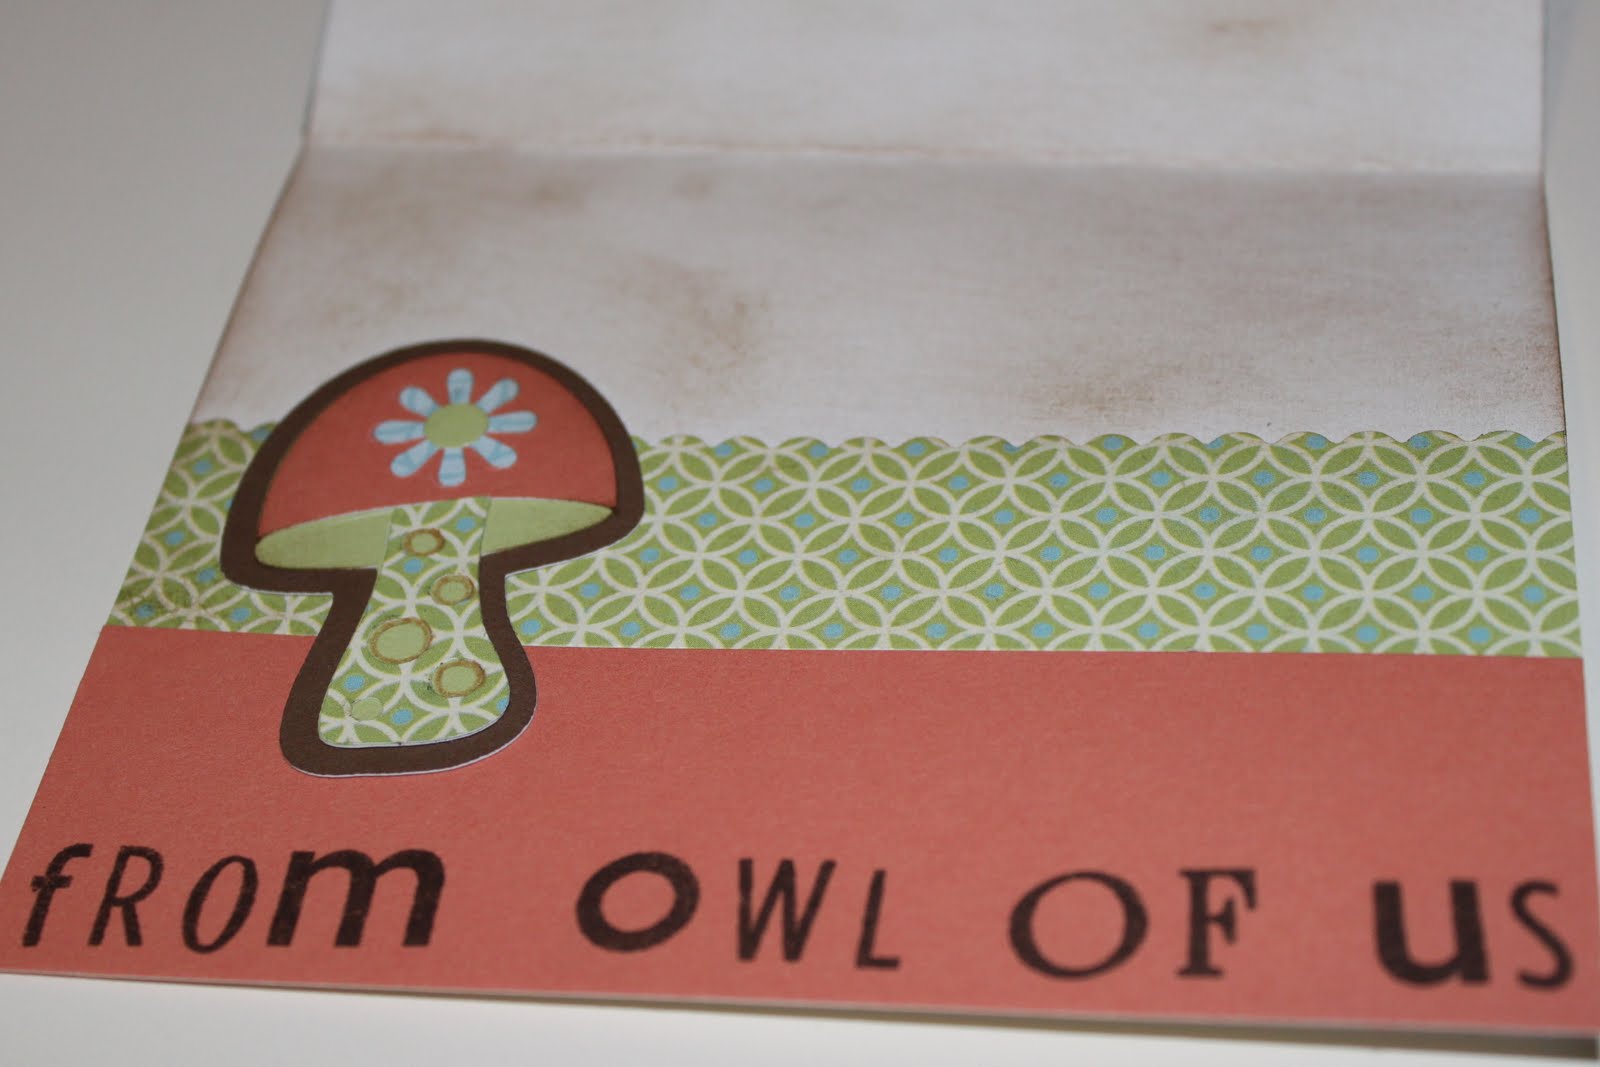
This weeks challenge at Celebrate the Occasion is ANY OCCASION and the colors are Green, white and another color. I chose RED. and St Patrick's Day. I hope you join us this week :) Celebrate the Occasion Challenge March 1st - March 2nd


Here is the tutorial video- Youtube screwed up my audio, so I will fix it soon :)


For the cute Shamrock from George and Basic Shapes tutorial watch my last years youtube videos below :)


I am linking this project up with Crafting with Christina, Really Reasonable Ribbon, and paper variety

Friday, February 25, 2011

The Liebster Blog Award!!!


We're so excited to get our first Liebster Blog Award from one of our favorite blogging friends, Amber!! Definitely make sure you check out her great blog at My 3 E Scrapbooking - she does the cutest projects and has some awesome ideas you can't miss!

So here are the rules of The Liebster Blog Award. It is given to bring light to new blogs and it's a great way to share blogs that might not otherwise be seen or ones you want to share with others.
As a recipient you must share the love and pay it forward by:
1-Creating a post where you blog about the Liebster award & reveal your 3-5 blog picks
2-Let them know you chose them by leaving a comment on their blog
3-Copy & paste the blog award on your blog
4-Have faith that your followers will rally & show their crafty love back out to those you awarded
5-Have fun!

Here are the blogs we have chosen after much deliberation :)

Linda's Creativity

Patti-Lynn Creations
Card Cupids Blog
Crafty Jar
Love to Crop

Please stop by and show these talented bloggers some love, you know how much we all love comments! Thanks again Amber!

Forever Young Embossed Purse

I used my Expression to cut a purse with all its layers using the Forever Young cartridge and then cut off the handle. Then I took the main piece and traced it onto a piece of folded cardstock so that it would make a card. I glued on the top part of the purse and ran the whole thing through my Sizzix with a Cuttlebug D'vine Swirl embossing folder. I added the ribbon handle, velvet rickrack, brads, and stitiching before gluing the front to the card base.

I used Dimensionals to make the flower layers stand out a little more and added a gem for some bling :) Then of course after using the Sew Easy paper piercer, I stitched along the bottom of the card.

I wanted to make a gift card holder because I always give away so many for birthdays, so I cut and sponged a piece of vellum and used a circle punch to cut out the notch.
I love challenges, so I combined a few for this card:

Cooking with Cricut - swirls
Simon Says Stamp - use brown and cream
Linda's Creativity - embossing
Fantabulous Cricut - embossing
The Paper Variety - stitching

Have a great day!


Wednesday, February 23, 2011

Paisley Owl Birthday

I love this paper from Close to My Heart - it's from the Twitterpated paper packet. It's so cute and woodsy and it inspired me to make this card using the owl from the Paisley cartridge.

I used the shadow feature to make the little owl stand out from the background paper. There was a lot of paper piecing, but I love all the layers to him. The buttons are also from the Twitterpated set and are made from chipboard, then I just added some ribbon and waxy flax to add some dimension.

I had to use the cute little mushroom somewhere so I just put it inside the card :)

I did a few different challenges with this card:

Die Cuttin' Divas - use silhouettes/shadows.
Card Makin Mamas - birthday
Two Scraptastic Gals - use Paisley cartridge
Simon Says Stamp - use brown & cream

Hope you're all having a great day!


Celebrate the Occasion Challenge Feb. 22- Sunday 27th

This weeks challenge is a Birthday, Anything goes. So what are you waiting for? Hop on over to Celebrate the Occasion and link up your project! The winner will be entered into a monthly drawing for yummy stuff. Or go see the great projects entered to get ideas for your next birthday project :)
Have a great day!
Hugs,
Paper Panther and Rayna

Monday, February 21, 2011

DT CTO Queen

Hi, Paper Panther here, wanting to share the good news that Rayna & I have been dying to tell you! We both made it into the Celebrate the Occasion Design Team!!!


(Look how cute their button is!)

For my project, I did a 6x6 card using Basic Grey paper. The image is from Indie Girl and the feathers were from my chickens in my backyard...no chickens were harmed in the gathering of the feathers :)

The crown is Creative Imaginations and it's from the rock star sticker set.

The brown velvet ribbon is from Fancy Pants Designs and the tulle is from Hobby Lobby.

The word Queen is on Tim Holtz's grungeboard, which I love by the way!

I inked around the edges with black using Stazon, which smells really good, and it doesn't rub off onto anything!

Make sure you check out everyone's cool projects at Celebrate the Occasion!


CTO Design Team Happy Birthday

I'm so excited, Paper Panther & I have been chosen to be on the Celebrate the Occasion Design Team!!! It should be lots of fun and we're looking forward to doing lots of great projects!!


Here is my card that I entered:


On the outside of the card, I was going for a treasure chest look with the plank paper and the sand dollar & ruby clasp :)

My son loves pirates, and I had made him a vinyl skull to put on the outside of his Nintendo DS, so I decided to make this card using the Life's a Beach cartridge. It did everything from the big X marks the spot to the cute treasure chest and pirate skull. Then I printed out the birthday sentiment.

I used some diamond & ruby bling for the pirate treasure!


Then I stitched the path to the X. I love the Sew Easy stitch piercer from We R Memory Keepers, it's so easy to use!

I'm so excited to be on the Celebrate the Occasion design team! Can't wait to get started :)


Thursday, February 17, 2011

Ladybug embossed tag


Wishing for spring, I made a simple little ladybug tag today. I used the Tags, Bags, Boxes & More cart to make the tag, then I used the Walk in My Garden cart to make the ladybug. I punched out some little hearts for the antennas and then used all kinds of ribbon to embellish it with. This My Mind's Eye paper is great because the glitter on it adds some sparkle, which of course I love! Tags are fun because they're so versatile - you can use them on gifts, cards, or scrapbook pages like I'm going to do with this one.

After I cut out the ladybug, I used scalloped scissors to cut around the red circle and then inked the red cardstock to make the dry embossed paper pop a little better. These are a few fun challenges I entered:

Erin Lee Creative wanted something with a destroyed technique.
Cooking with Cricut wanted an embossed project.
Fantabulous Cricut is looking for a project featuring your favorite season.

Hope everyone is having a great day!


Cinderella Tag

Here is my video on this: Cinderella Tag
Hi everyone, I just wanted to show you this tag I made. It is my first real tag and I had a blast doing it :) I tore the backside bottom, and I ripped the sides up using the Tonic Distress Tool by Tim Holtz. I distressed all the tags with the same tool.

Here are three of the smaller tags that go in the back envelope. This one opens up.Here are the back sides of the three little tags.
Here are the fronts of them.
This is the top of the backside of the tag
Here is the envelope that holds the 3 mini tags- this is the envelope from the Doddlecharms Cricut Cart.
Here is the entire backside of the tag

This is the top front of the tag
Here is the entire front of the tag- I love that black trim.
I made my own stick pin using a boutonniere pin and putting some jewelry together from a broken necklace :)
I used turquoise embossing glitter by Ranger for the flourish and black diamond stickles for the shoe


Thanks! I am linking this up with Erin Lee Creative's challenge, and Cooking With Cricut, and simonsaysstampschallenge

Wednesday, February 16, 2011

Flower Embellishment Layout


For this page, I made my own embellishment using wire & beads and then I just twisted it around to make a flower. I used glue dots to adhere the silk flower and button and to attach the whole thing to the page.


Over at the Simon Says Stamp Challenge Blog, they're having a challenge to make your own embellishment, so I thought I would do that and get one more layout behind me trying to catch up with my scrapbooking :) Have a great day!


Surfer Birthday Card


Using My Minds Eye's Breaking Free adventure Series I cut the 12x12 in half to make a 6x6 card. I used Star 1 from George and Basic Shapes and cut several out to layer and make the sun. I used stickles in crystal and frosted lace for the clouds and the wave. The sun and MME surf board are popped out with demensionals. The Birthday Wishes on the surf board is a Karen Fosters rub-on transfer Happy Birthday series.

I am linking up with Celebrate the Occasion and Die Cuttin' Diva's
Have a great day!
- Paper Panther